Friday, October 14, 2016
Non Destructive Editing in Photoshop
Non Destructive Editing in Photoshop
The Goal:
Edit an image in Photoshop, to enhance, to improve it... and be able to easily "tweak" or undo/redo the "fixes" at a later date.
In Photoshop you are editing pixels, as a result you should always work on a "copy" of the image, not the original.
1. In Photoshop after loading an image, use the File > Save As menu
and save the files as a copy, or rename the file as... I usually just use a numbering system like imagename-001.psd.
This ensures you have an "original" RGB copy, even if you have the original raw image.
2. In your editing process you always want to use the Adjustment panel and the Adjustment layer tools.
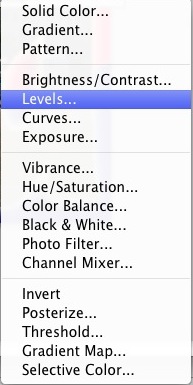
list of adjustment layers… from the layers menu
An Example of using Adjustment layers...
3. Create a Blank Layer
When using any of the tools like the Clone or Healing Brush or Spot Healing Brush to edit pixels, create a Blank Layer and use the Tool Bar to toggle on "Edit layers below"
Heres a short tutorial that uses "Edit Layers Below"
4. Make a Flattened copy of the visible layers , If you can only directly edit pixels.
This is useful if you want to use the Menu
Image > Adjustments > Shadow/Highlight…or any other "Adjustment" that does not have an "Adjustment layer".
Except...
(Note Well) The adjustment HDR Toning…
Menu: Image > Adjustments > HDR Toning…
Automatically flattens all layers. So, if you want to preserve layers before you use this adjustment, save the file first as a .PSD and then do the HDR Toning…as it flattens all layers to make a "single" image!
To Flatten Selected layers Keyboard Short cut
Mac (Command + Option + Shift + E)
PC (Control + Alt + Shift + E)
and apply the Adjustment to the flattened copy of the all the layers...
To re-edit the Shadow/Highlights… youll need to delete the layer and repeat the process...
Enjoy! As Always holler if you have a question or comment
Next up: Using Smart Layers
Go to link Download


